
How to Load MX5500 Price Guns (5500EOS Guide)
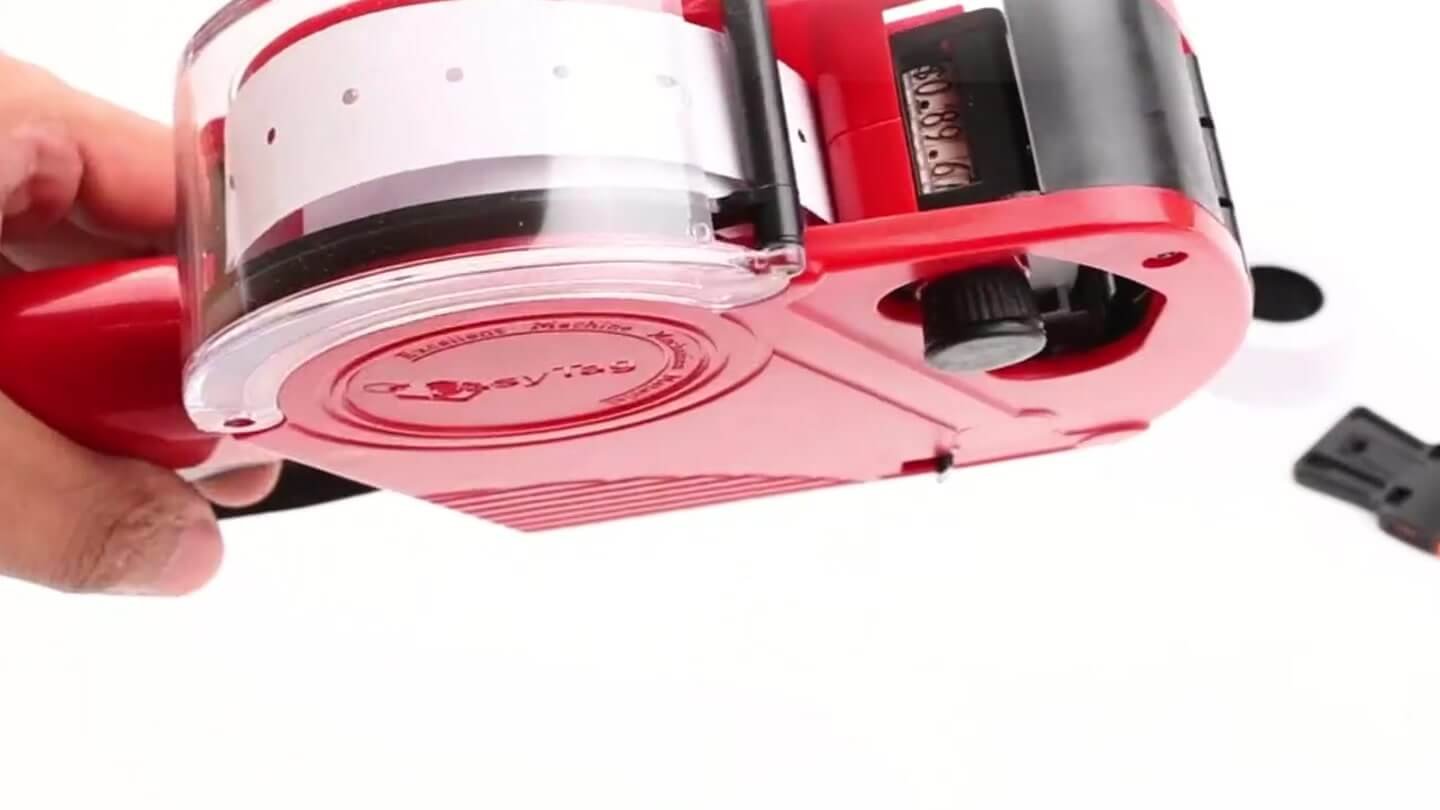
To load an MX5500 price gun, open the top cover. Drop the roll in, labels feeding off the bottom. Release the catches and open the base plate. Open the inner gate. Thread the strip through the front slot. Seat the backing holes on the sprocket teeth and close the gate. Close the base plate and squeeze three or four times.
The MX5500 is the most copied price gun body in the world. Dozens of brands build to the same one-line, 8-digit pattern, which is good news for labels and bad news for instructions. Search for how to load MX5500 guns and you get a wall of silent videos, mirrored diagrams and pages that skip the one part that actually matters.
This guide explains how to load MX5500 price guns properly, using the Easy Tag 5500EOS as the working example. The 5500EOS is built on the standard MX-5500 style body, so the sequence here applies whether your handle says 5500EOS or something else entirely. (You will see the model written as MX5500, MX-5500 and MX 5500. They all refer to the same body pattern.) If you have not used one before, start with how to use a price gun.
The short version of how to load MX5500 guns: open the top cover, drop the roll in so the labels feed off the bottom, release the base plate, open the inner gate, thread the strip out through the front slot, seat the backing holes on the sprocket teeth, close the gate, close the base plate, then squeeze three or four times. The inner gate is the step almost every guide on how to load MX5500 guns leaves out.
Need the gun from this guide?
Both kits come with 5,000 labels.
Is Your Gun an MX5500 Style Body?
Check three things before you go any further. If all three are true, everything below on how to load MX5500 guns applies to the tool in your hand.
- One line of print. A single row of characters, not two stacked rows. Two-line guns load differently and take a different label.
- Eight print wheels. Count the characters on a printed label, or count the bands behind the print head.
- A hinged base plate under the handle, held by two small black catches, with a round label cradle under a clear top cover.
The Easy Tag 5500EOS matches all three. So do most of the guns sold under other names on the same pattern. MX-5500 itself is a model name used by other manufacturers, so the 5500EOS is not an MX-5500, it is built to the same one-line format and takes the same standard label rolls.
The fastest way to check is to compare your gun with a side-on photo of a known MX5500 body, such as the one on the Easy Tag 5500EOS listing on Amazon. If the label window, trigger and feed channel sit in the same places, the loading steps below are the right ones for your gun.
The Parts You Need to Name Before You Learn How to Load MX5500 Guns
Loading goes wrong because the parts have no names printed on them. Name them once and every instruction on how to load MX5500 guns stops feeling random.
- Top cover. The clear plastic lid on top of the gun. It pops open to reveal the label cradle.
- Label cradle. The round well the roll sits in.
- Base plate. The panel under the handle, held by two black catches on the sides. It swings down and away.
- Inner gate. A small hinged flap behind the base plate, sitting directly over the sprocket wheel. This is the part everybody misses.
- Sprocket wheel. A toothed wheel that grips the row of holes running along the backing paper. This is what actually pulls the strip through the gun.
- Front slot. The exit at the nose where the printed label peels off.
- Side knob. Sets the eight print wheels. Pull out, slide, rotate, push in.
- Ink flap. A small door at the nose of the gun holding the ink roller.
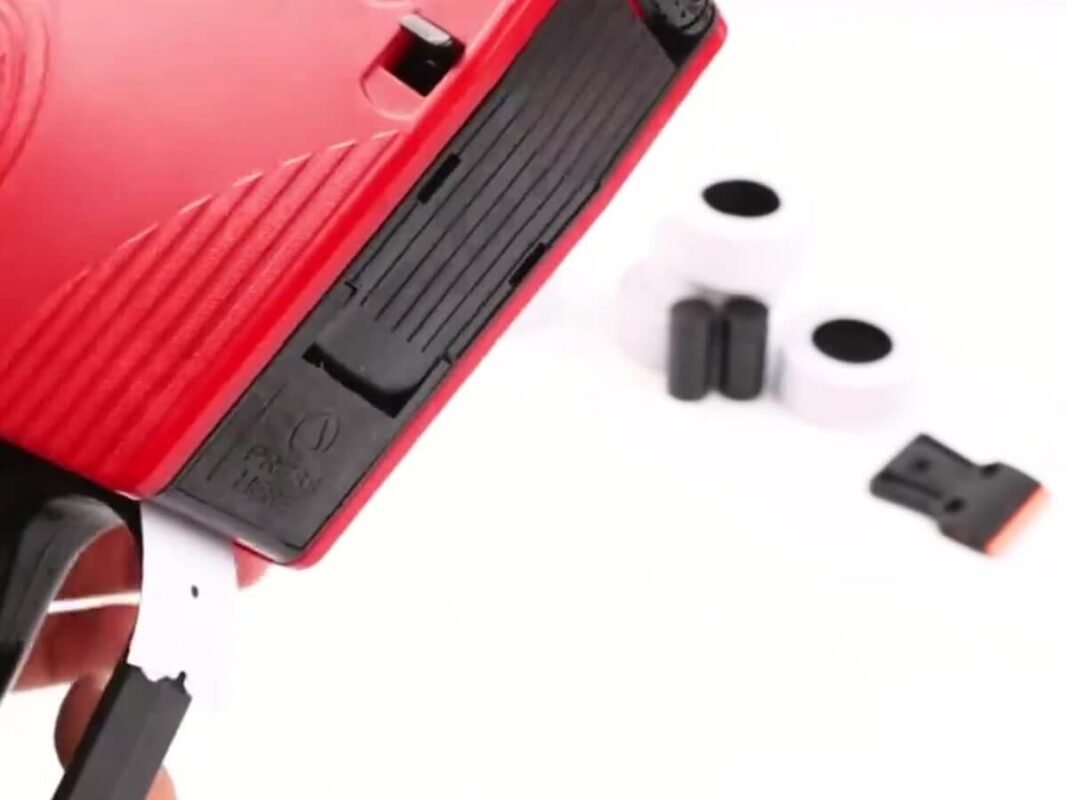
Anyone learning how to load MX5500 guns for the first time should find the inner gate before doing anything else. Open the base plate, look behind it, and flip the gate. Once you have seen it move, the rest of the sequence makes sense.
First, Peel Off the First 25 Labels
No guide on how to load MX5500 guns is complete without this, and almost none of them mention it. Do it before you thread anything. Unroll the new strip, peel off roughly the first 25 labels and throw them away.
The leading edge of a fresh roll rarely sits square on the backing paper. Corners lift, and lifted corners catch inside the label path. That is where most first-day jams begin. You lose a handful out of 5,000 labels and you skip the frustration entirely.
How to Load MX5500 Price Guns: Step by Step
Work on a table, not in your hands. The last step needs both hands free.
- Open the top cover. Pop the clear cover on top of the gun to expose the label cradle.
- Drop the roll in the right way round. The labels must feed off the bottom of the roll and travel toward the front of the gun. Loaded the other way, nothing will feed and the gun will feel broken. Press the roll down until it seats flat.
- Release the base plate. Pull back the two black catches on the sides of the handle. The base plate drops away.
- Open the inner gate. Flip open the small hinged gate over the sprocket wheel. Every guide on how to load MX5500 guns that skips this step is why people give up on step five.
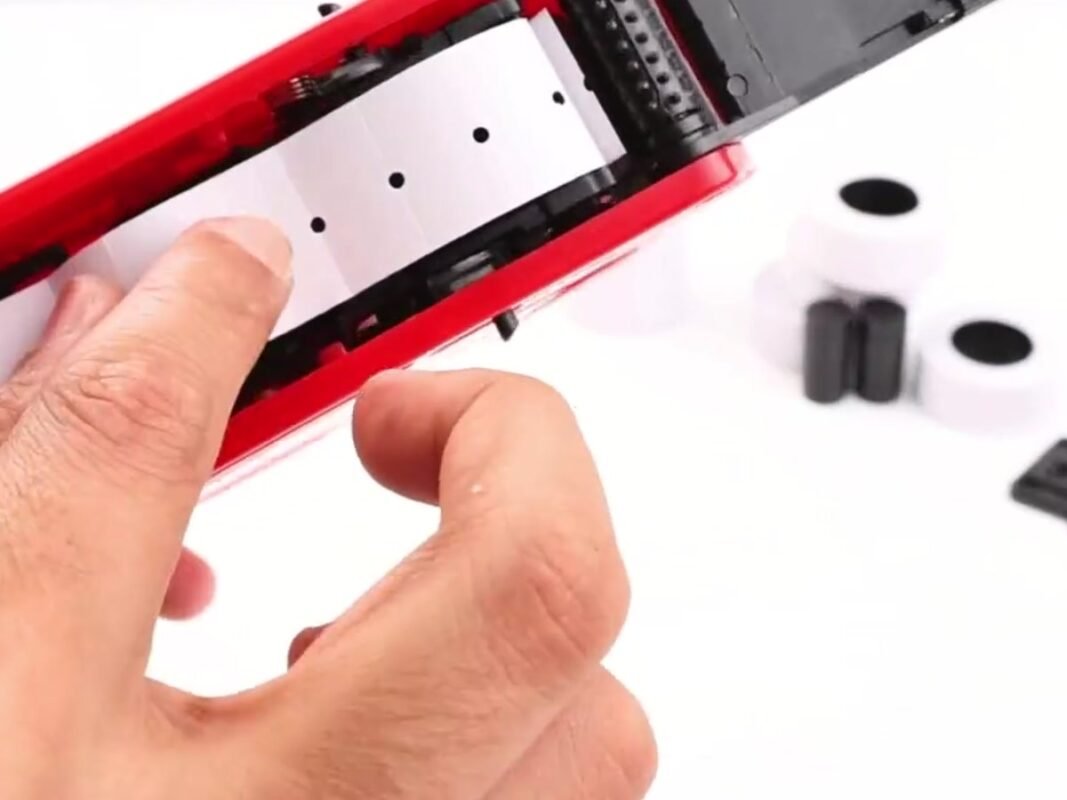
- Thread the strip through the front slot. Feed the end of the strip forward through the slot at the nose. Pull until roughly four to five inches of backing paper hangs out the front.
- Seat the holes on the sprocket teeth. The backing paper has a row of small holes along each edge. Sit those holes onto the teeth, then close the inner gate over them. Take the extra few seconds to get them straight. This is the whole feeding mechanism.
- Close the base plate and test. Snap it shut until both catches click. Squeeze the trigger three or four times. The first squeeze or two may come out blank while the strip takes up tension. By the third, a printed label should peel off the front edge.
If the strip slips or the labels bunch after two squeezes, stop. Open the gun, pull the paper back out through the front, and re-seat the holes. Re-threading takes twenty seconds. Forcing the trigger tears the backing paper and turns a small problem into a real jam, which is the one way how to load MX5500 guns goes badly wrong.
The Two Mistakes Behind Almost Every Jam
Support questions about how to load MX5500 guns come back to the same two errors, over and over. Check these before you assume the gun is faulty.
Mistake one: the roll is in backwards. If the labels come off the top of the roll instead of the bottom, the strip fights the feed path from the first squeeze. Nothing advances, and it feels like a mechanical fault. Take the roll out, flip it, and press it flat into the cradle.
Mistake two: the inner gate was never opened. If you thread the strip without opening that gate, the backing holes sit above the sprocket teeth rather than on them. The gun prints, the strip does not move, and labels stack up inside the body. Open the base plate, open the gate, seat the holes, close the gate over them, then close the plate.
Check those two before anything else and you will fix nine jams out of ten in under a minute. They are the whole difference between how to load MX5500 guns in theory and doing it on a busy morning.
MX5500 Labels: What Fits
Knowing how to load MX5500 guns is only useful if the roll in your hand belongs there. One-line MX5500 style guns take a standard one-line price gun label roll. That standard is the reason this body pattern is so widely copied. Buy any roll described as MX-5500 compatible and it will feed.
What matters when you buy:
- One line, not two. Two-line labels are taller and will not sit correctly in a one-line gun.
- Sprocket holes along the backing edges. Without those, the sprocket wheel has nothing to grip.
- Adhesive type. Permanent for general retail. Removable for anything you plan to re-price or resell.
- Cold-temperature adhesive if you are labelling refrigerated or frozen stock. Standard adhesive loses grip when condensation forms.
The standard size across MX-5500 style bodies is 21mm x 12mm (0.83in x 0.47in). The Easy Tag 5500EOS kit includes 5,000 white labels at that size, supplied as 10 rolls of 500, so the first several months are covered before you buy anything.
After Loading: Set the Wheels and Prime the Ink
Loading is done. Two short steps stand between you and a usable label, and neither is covered by most pages on how to load MX5500 price guns.
Set the eight wheels. Pull the side knob straight out, slide it until the marker sits over the wheel you want, rotate to the character you need, then repeat. Push the knob all the way back in when you are finished. A knob left half out lets the wheels drift and prints half a price.
Prime the ink roller. A fresh roller prints grey for the first few squeezes because the ink has not spread across all eight wheels. Print five or six labels onto scrap paper and watch it darken. If it stays pale on one side, the roller is sitting crooked, so pull it out by the tab and press it back in until it clicks.
Troubleshooting Right After Loading
Even when you follow how to load MX5500 guns exactly, a roll can still misbehave on the first squeeze. Find your symptom below.
The trigger squeezes but no label comes out
The strip is not engaged with the sprocket. Open the base plate, check the holes are sitting on the teeth, and check the inner gate is closed over them.
Labels stack up inside the gun
The strip is feeding but not exiting the front slot, usually because the paper was threaded under the front guide instead of through it. Pull the strip back out through the front and re-thread it.
The backing paper tears at the holes
Either the holes were seated crooked, or you pulled the strip backward through the gun. Cut off the damaged section with scissors so you have a clean straight edge, then start again.
Two labels come out at once
The roll is spinning loose in the cradle and the strip has slack in it. Open the top cover, press the roll flat, then pull the loose backing paper back through the front to take up the slack.
Print is faint on the first labels
That is normal. The roller needs priming. Six labels on scrap paper usually fixes it. If it stays grey, fit one of the spare rollers from the kit.
For the longer troubleshooting list, including sticky sprocket teeth, stiff triggers and labels that will not adhere, see our price gun troubleshooting guide.
Frequently Asked Questions
Are the steps for how to load MX5500 guns the same on every brand?
On one-line, 8-digit bodies built to the MX-5500 pattern, yes. The cover, cradle, base plate, inner gate and sprocket sit in the same places, so how to load MX5500 guns reads the same across brands. Catch shapes and cover colours differ, the sequence does not.
Is the Easy Tag 5500EOS the same as an MX-5500?
No. MX-5500 is a model name used by other manufacturers. The 5500EOS is a separate gun built to the same one-line, 8-digit format, and it takes the same standard label rolls. If you already buy MX-5500 compatible labels, they will fit.
Which way round does the label roll go?
Labels feed off the bottom of the roll, toward the front of the gun. If the strip comes over the top of the roll, it is in backwards.
What is the inner gate for?
It clamps the backing paper onto the sprocket teeth. Without it closed, the teeth cannot grip the holes and nothing feeds, no matter how hard you squeeze.
Why does my gun jam every time I load a new roll?
The leading edge of a new roll usually has lifted label corners that catch in the label path. Peel off the first 25 labels of every roll before threading and the problem mostly disappears.
Can I load the gun without opening the base plate?
No. The sprocket wheel and the inner gate both sit behind the base plate, so every method of how to load MX5500 guns starts with releasing those two catches.
How long does loading take once you know how?
About a minute. The first attempt takes most people five to ten, mainly spent finding the inner gate. After two rolls, how to load MX5500 guns stops being something you think about.
Where do I find replacement labels and ink rollers?
Any standard one-line MX-5500 compatible roll at 21mm x 12mm will feed, and any one-line ink roller will seat. Easy Tag’s own refill pack is 5,000 labels in 10 rolls of 500, which matches the kit exactly, so you can reorder without measuring anything.
Get a Gun That Comes Ready to Load
Now that you know how to load MX5500 price guns, the rest of the tool is straightforward. Set the wheels, prime the ink, squeeze. Nothing to charge, nothing to update.
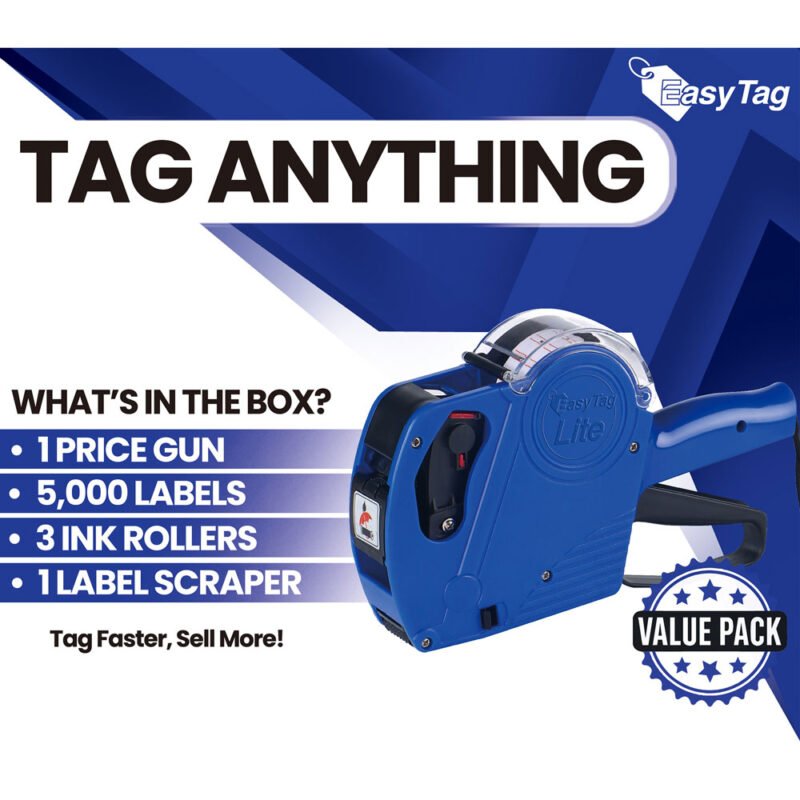
The Easy Tag 5500EOS is an 8-digit, one-line gun on the standard MX-5500 style body, and it ships as a complete kit at $24.99 with 5,000 white labels, 3 ink rollers and a label scraper. Pick a colour: the Easy Tag 5500EOS in Blue or the Easy Tag 5500EOS in Red.
US standard delivery is 3 to 5 business days, with 30-day returns on unused kits in original packaging. Easy Tag does not ship to Alaska, Hawaii, Puerto Rico or US territories.
Need the gun from this guide?
Both kits come with 5,000 labels.