
How to Use a Price Gun: Beginner’s Guide
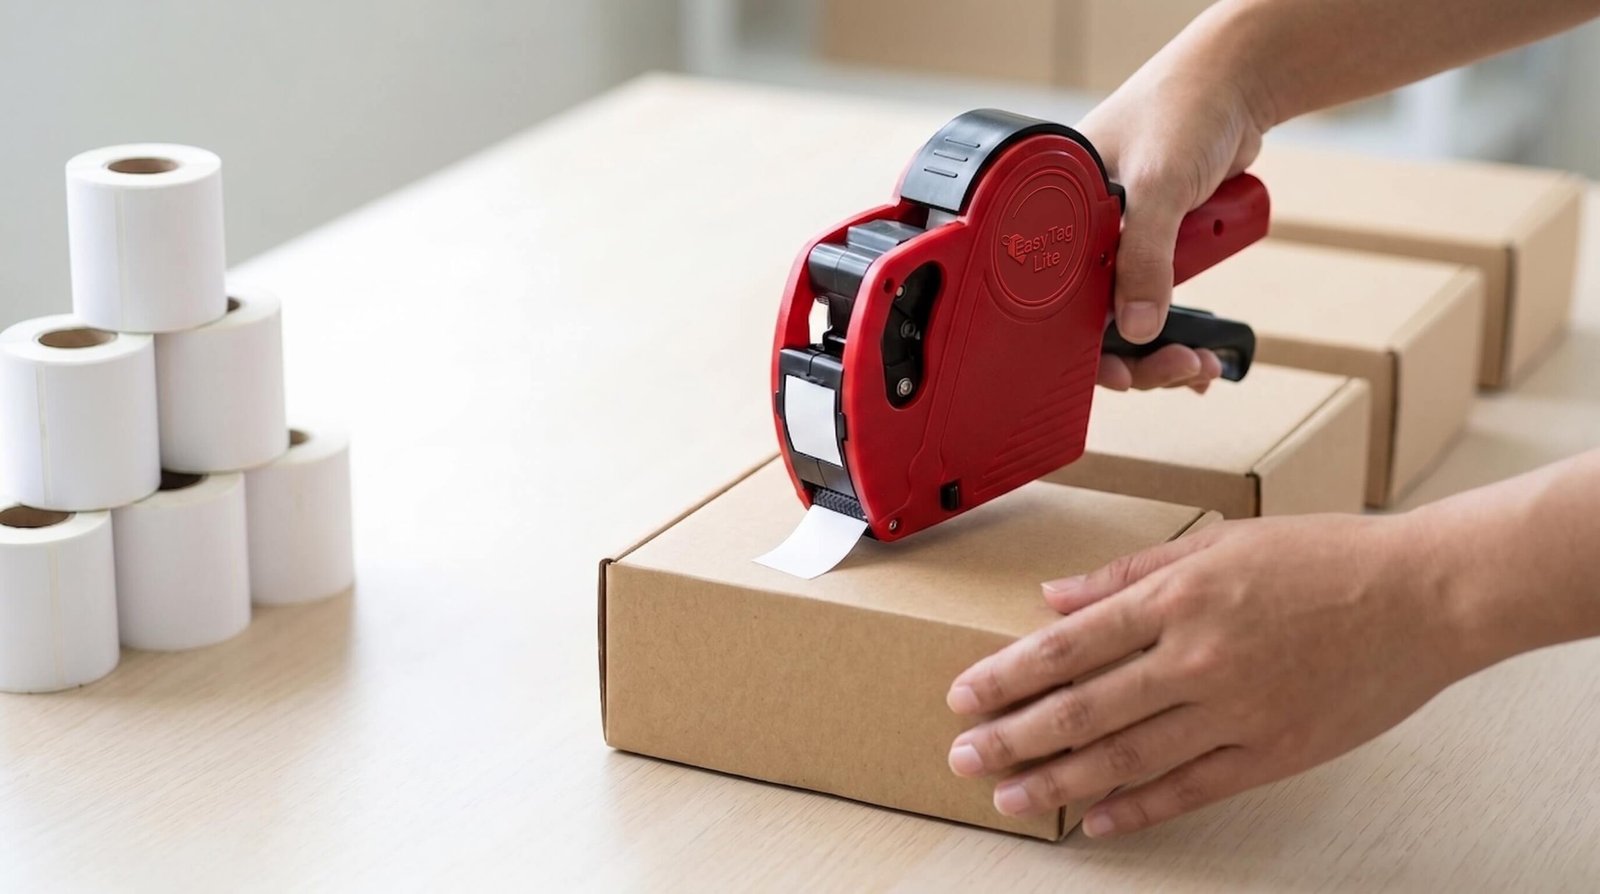
To use a price gun, load the label roll so labels feed off the bottom. Set the eight print wheels with the side knob and push it back in. Prime the ink roller by printing five or six labels on scrap paper. Press the gun’s nose flat on the product, squeeze once, and hold the label down for two seconds.
A price gun has no screen, no battery and no software. That is exactly why people search for how to use a price gun once the box is already open. Nothing on the outside of the tool tells you where to start, the parts are not labelled, and the folded slip inside the box is usually a diagram with no words.
This guide walks through how to use a price gun from the first unboxing to a fully priced shelf. It is written around the Easy Tag 5500EOS, an 8-digit, one-line gun built on the standard MX-5500 style body. The steps apply to most one-line price guns, so follow along even if yours carries a different name on the handle.
The short version: load the label roll, set the eight print wheels to your price, prime the ink roller on scrap paper, then press the nose of the gun onto the product and squeeze. Everything below covers those four moves in detail, plus the mistakes that cost most beginners their first hundred labels. That is all how to use a price gun amounts to once the jargon is stripped out.
Need a price gun?
This guide uses the Easy Tag 5500EOS. Both kits come with 5,000 labels.
Before You Start: What Is in the Box
Open everything and lay it out. Two minutes here saves ten minutes of guessing later, and half the confusion around how to use a price gun comes from not knowing which part is which.
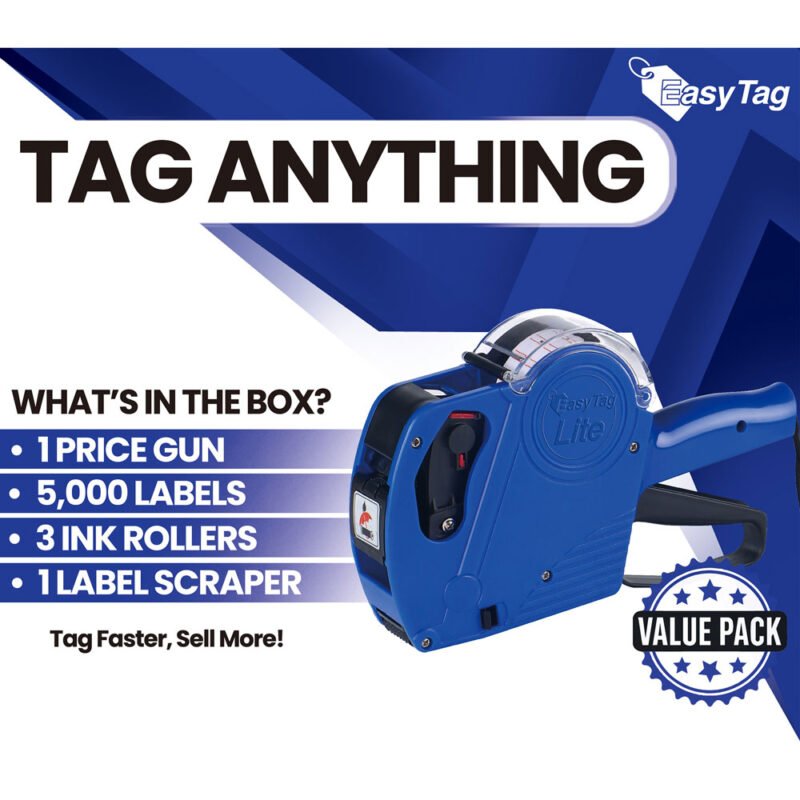
- The price gun. Eight print wheels on one line, in reinforced ABS plastic at 0.64 kg (about 1.4 lb). A trigger, a side adjustment knob, a clear top cover, and a hinged base plate under the handle.
- 5,000 white labels, supplied as 10 rolls of 500 at 21mm x 12mm. Enough to price a full shelf reset and keep going for months in a small shop.
- 3 ink rollers. One is already fitted in the gun. Two spares stay in the box.
- 1 label scraper. A flat plastic tool for lifting old labels off stock without scratching the surface.
Nothing else is needed on day one. There is no charger, no cartridge to order and no app to install. The gun is fully mechanical, so the trigger does all the work.
If you are reading this before buying, check that your kit includes labels and a spare ink roller, because a gun on its own leaves you stuck on day one. The Easy Tag 5500EOS price gun in blue is sold as a complete kit, so the steps below apply from the moment the box opens.
How to Use a Price Gun: The Four Steps That Matter
Learning how to use a price gun comes down to four steps. Get these right and the tool becomes automatic within about twenty labels.
Step 1: Load the Label Roll
Loading is the step that stops almost everyone. The roll has to sit the right way round in the cradle, the backing holes have to sit on the sprocket teeth, and the inner gate has to close over them before the base plate shuts.
Here is the sequence in short form:
- Pop open the clear top cover and drop the roll into the cradle so the labels feed off the bottom, toward the front of the gun.
- Pull back the two black catches on the sides of the handle and let the base plate drop away.
- Flip open the small inner gate that sits over the sprocket wheel.
- Thread the label strip forward through the front slot until about four inches of backing paper hangs out.
- Sit the row of holes in the backing paper onto the sprocket teeth, then close the gate over them.
- Snap the base plate shut until both catches click, then squeeze the trigger three or four times.
The first squeeze or two may come out blank while the strip takes up tension. By the third, a printed label should peel off the front edge.
If any of that is unclear with the gun in your hand, read the full walkthrough with the jam fixes in How to Load a Price Gun: A Beginner’s Step-by-Step Guide. It covers each catch, gate and sprocket in detail, and it explains why you should peel off and bin the first 25 labels of every new roll.
Step 2: Set the Price on the Eight Wheels
Step two in how to use a price gun is setting the print. Eight wheels sit in a row behind the print head, and a knob on the side of the gun controls them one at a time.
- Pull the side knob straight out. It will not turn until it is out.
- Slide it left or right until the marker sits over the wheel you want to change.
- Rotate the knob to cycle that wheel through its characters until the one you want shows.
- Repeat for each wheel, then push the knob all the way back in.
A knob left half out lets the wheels drift while you work, and you end up with half a price on the label. Push it home, then print one test label onto scrap paper before you touch stock. A wheel set one position off is hard to spot on the gun and painfully obvious across 200 mislabelled items.
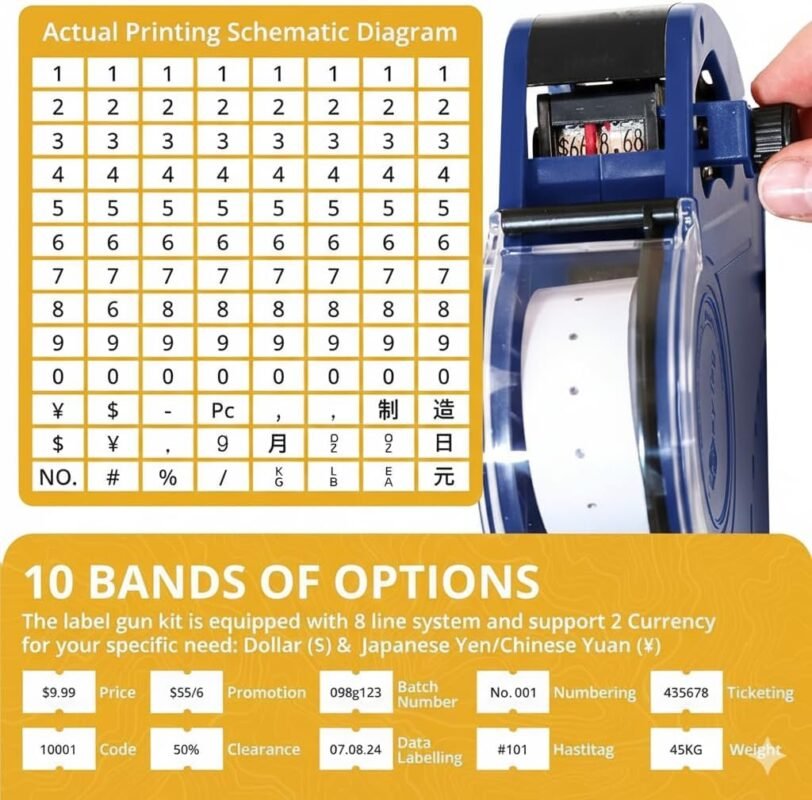
Easy Tag lists the 5500EOS print head as 8 bands of alphanumeric characters, so each of the eight positions carries letters as well as numbers. Print a full test line onto scrap paper the first time you use the gun and you will see exactly what every wheel offers. It is a thirty-second habit that answers most questions about how to use a price gun faster than any manual.
Step 3: Prime the Ink Roller
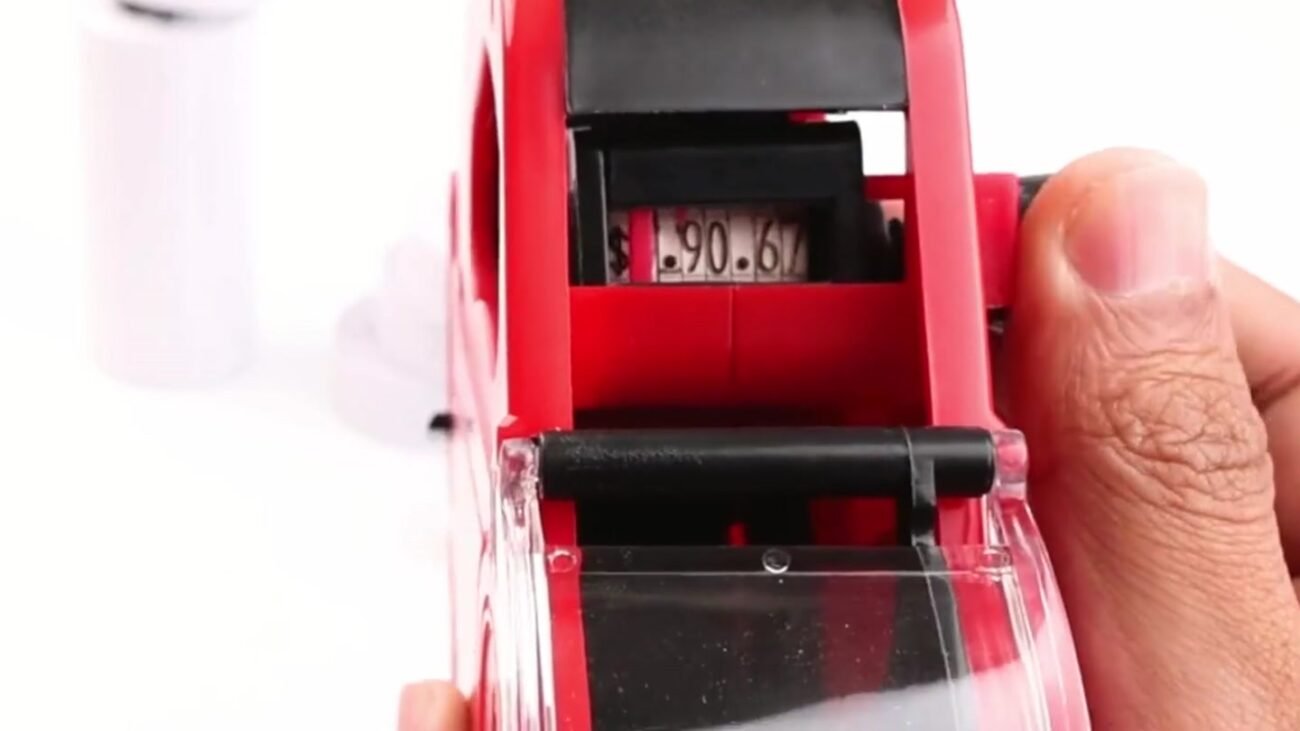
This is the step people skip when they are working out how to use a price gun, and then report a faulty tool. A brand new gun prints faint for the first few squeezes. The ink has not spread across all eight wheels yet.
Squeeze five or six labels onto a scrap of paper and watch the print darken. By the sixth it should be solid. If it is still grey after priming, the roller may be seated crooked, so open the small flap at the nose of the gun, pull the roller out by its tab and press it back in until it clicks. Use the scraper or tweezers rather than your fingers, because the ink transfers to skin and stays there.
Step 4: Print and Apply the Label
The last part of how to use a price gun is the part nobody explains. You do not peel a label and stick it. You press the nose of the gun onto the product and squeeze, and the roller on the front edge lays the label down as the gun prints the next one.
- Wipe the spot on the product if it is dusty or damp.
- Hold the product still with your other hand.
- Set the front roller flat against the surface where the label should sit.
- Squeeze the trigger in one firm, complete motion.
- Press the label down with your thumb for a full two seconds.
That two-second press is the difference between a label that holds and one that curls up on a shelf overnight. Cold or refrigerated stock is the exception. Condensation beats standard adhesive, and those items need cold-temperature labels.
How to Hold the Gun So Labels Land Straight
Most crooked labels come from the wrist, not the tool. Nobody explains this part of how to use a price gun, so beginners tend to stab at the product at an angle, which lifts one corner of the label before the adhesive grabs.
Keep the flat front face of the gun parallel to the surface you are labelling. Lead with the roller edge, not the tip. Squeeze in one motion instead of easing the trigger, because a slow squeeze prints lighter and drops the label unevenly. On round items like jars and bottles, label the flat top or the flat panel of the shoulder rather than the curved side, where the corners will always lift. Grip and angle are the difference between knowing how to use a price gun and using one well.
Pricing a Whole Shelf: A Workflow That Saves Time
Knowing how to use a price gun on one item is easy. Doing 400 items in an afternoon is a different job, and the order you work in decides how long it takes. This is where knowing how to use a price gun efficiently is worth more than knowing how to use one at all.
- Sort by price first, not by shelf. Group everything that costs the same, price that whole group, then change the wheels once. Every wheel change costs you fifteen seconds, and changing per item is where the afternoon disappears.
- Work out of a box or trolley, not off the shelf. Reaching up and down is slower than pulling items toward you.
- Pick one label position per product type and stick to it. Top right on boxes, base on jars, back panel on anything with artwork you do not want covered. A shelf where every price sits in the same spot looks like a shop instead of a car boot sale.
- Keep the scraper in your pocket. Repricing existing stock means lifting the old label first, and searching for the scraper twenty times an hour adds up.
- Print a test label after every wheel change. One scrap label is cheaper than restickering a case of 24.
Mistakes People Make When Learning How to Use a Price Gun
These come up again and again in reviews and support questions from people working out how to use a price gun for the first time. Every one is avoidable.
- Loading the roll upside down. The labels must come off the bottom of the roll. Loaded the other way, nothing feeds and the gun feels broken.
- Skipping the inner gate. If the gate does not close over the sprocket teeth, the paper slips and the labels bunch.
- Using the first labels off a new roll. The leading edge of a fresh roll is rarely square, and lifted corners are the number one cause of jams. Peel off 25 and bin them.
- Forcing the trigger through a jam. That tears the backing paper and turns a twenty-second fix into a real clean-out.
- Tapping the label on instead of pressing it. The adhesive needs contact time and pressure.
- Labelling dusty, oily or damp surfaces. Wipe first. No adhesive beats dust.
- Leaving the front ink flap open overnight. The roller dries out faster than people expect.
- Storing spare rolls somewhere warm. Heat turns the adhesive gummy inside the roll, and gummy labels jam.
Keeping the Gun Working
Maintenance on a mechanical gun takes seconds, not minutes, and it is the part of how to use a price gun that decides whether the tool lasts one season or ten.
- Weekly: wipe the label path with a dry cloth. Paper dust builds up and drags on the backing strip.
- Monthly: check the sprocket teeth for adhesive buildup and pick it off with the scraper tip. Never use a metal blade.
- When print goes grey: fit a fresh ink roller. Your kit ships with two spares.
- Never oil it. Oil collects paper dust and traps it against the print head.
- Storage: keep the gun and the spare rolls somewhere cool and dry, with the ink flap closed.
Beyond Prices: Dates, Codes and Stock Numbers
Eight wheels do not have to hold a price. Cafes and delis set them to a use by date. Warehouses set a received date or a short batch code. Market traders set a price on one half and a size code on the other.
Nothing changes about how you operate the gun. You set the wheels, prime the ink and squeeze, exactly as you would for a price. Once you know how to use a price gun for prices, you already know how to use it for dates. That second use case is the reason a lot of food businesses buy a one-line gun in the first place.
Frequently Asked Questions
Is it hard to learn how to use a price gun?
No. Loading the first roll is the only fiddly part, and it takes most people two attempts. After that, setting a price and applying a label takes a few seconds per item.
Does a price gun need batteries or power?
No. The Easy Tag 5500EOS is fully mechanical, which is one reason how to use a price gun is easier to learn than most tools. The trigger drives the print head and feeds the label strip, so there is nothing to charge and nothing to fail during a busy Saturday.
Why is my price gun printing blank labels?
Either the ink roller has dried out or a new one has not spread ink across all eight wheels yet. Print six labels onto scrap paper first. If the print is still grey, fit a spare roller from the kit.
How do I fix labels that bunch up inside the gun?
Open the base plate and the inner gate, pull the whole strip back out through the front, cut off any crumpled section with scissors, then re-seat the backing holes on the sprocket teeth. Never pull the strip backward through the gun.
Can I reuse a label after peeling it off?
No. The adhesive picks up dust and paper fibres on the way off and will not hold a second time. Lift the old label with the scraper, wipe the spot, and print a fresh one.
What labels fit the Easy Tag 5500EOS?
Standard one-line MX-5500 compatible rolls at 21mm x 12mm (0.83in x 0.47in), which is the most widely stocked price gun label size. The kit ships with 5,000 of them as 10 rolls of 500, and you are not locked to one supplier once they run out.
How long does it take to learn how to use a price gun properly?
Most people are labelling confidently inside ten minutes. The habits that prevent jams, peeling the first 25 labels and priming the ink on scrap paper, are worth building from day one.
Can one gun print both prices and dates?
Yes. All eight wheels are yours to set, so a date, a batch code or a stock number works the same way a price does. Nothing about how to use a price gun changes when you switch from a price to a date.
Start Labelling
Learning how to use a price gun is a ten-minute job with a tool that then lasts for years. Load the roll properly, set the wheels, prime the ink, press for two seconds. Those four habits cover almost everything.
The Easy Tag 5500EOS ships as a complete kit at $24.99, with 5,000 white labels, 3 ink rollers and a scraper in the box, so you can price stock the day it arrives. Choose your colour: the Easy Tag 5500EOS in Blue or the Easy Tag 5500EOS in Red.
US standard delivery runs 3 to 5 business days, and returns are accepted within 30 days of delivery on unused kits in original packaging. Easy Tag does not ship to Alaska, Hawaii, Puerto Rico or US territories.
Need a price gun?
This guide uses the Easy Tag 5500EOS. Both kits come with 5,000 labels.